Guide: Installing Ollama on macOS via Command Line
Ollama can be easily installed on macOS using Homebrew, a popular package manager. Below are the steps to install and verify Ollama on a Mac. You can also choose to download the installers directly from the Ollama website if you prefer that https://ollama.com/. There is always many ways to Rome as they say :). I choose to use Homebrew in this example
Step 1: Install Homebrew (if not already installed)
Homebrew is necessary for installing Ollama. If you already have Homebrew installed, you can skip to Step 2. If not, open your terminal and install Homebrew by running the following command:
/bin/bash -c "$(curl -fsSL https://raw.githubusercontent.com/Homebrew/install/HEAD/install.sh)"What does this command do?
- It downloads and runs the official Homebrew installation script from GitHub.
- The installation script will guide you through the process. It may ask for your password to complete the installation
- Optional Check: After installation, verify that Homebrew is installed correctly by running:
brew --versionThis command should output the installed version of Homebrew. Like this

Step 2: Install Ollama
Once Homebrew is installed, you can use it to install Ollama with the following command:
brew install ollama- What does this command do?
- It tells Homebrew to download, install, and configure Ollama on your Mac.
- The process will automatically resolve any dependencies required by Ollama, so you don’t have to worry about installing other tools manually.
Step 3: Verify the Installation
After Ollama is installed, you can try it at the command line, first time it might take a while, as the model is being pulled from the ollama website, and you can interact with it directly in the terminal.
After installation, you can start using Ollama directly from the command line.
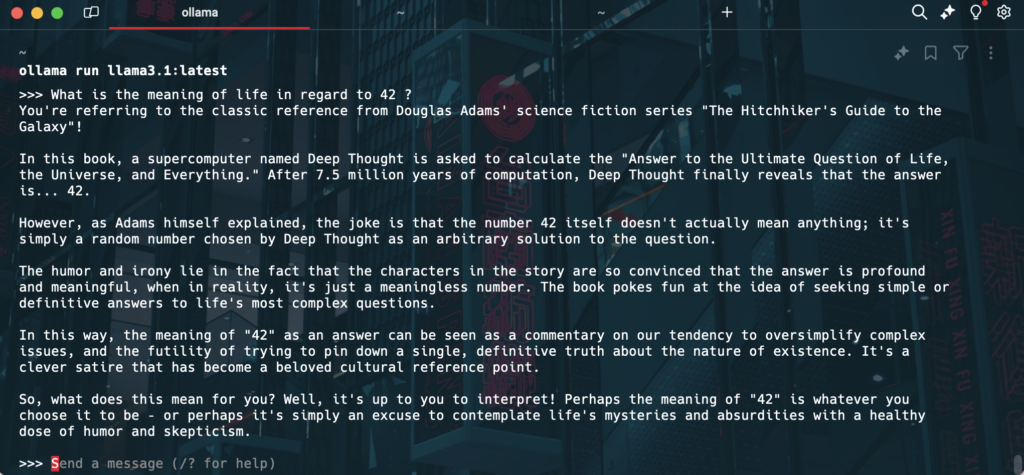
ollama run llama3.1:latestNow you are running Ollama, and you should be able to test it, and get a result like the picture below

Help Documentation: You can also explore the available options and commands by running: ollama --helpThis will display all the available subcommands and their descriptions, giving you a quick overview of how to interact with Ollama.
Step 5: Keeping Ollama Up-to-Date
To ensure you always have the latest version of Ollama, periodically update Homebrew and upgrade Ollama:
brew update && brew upgrade ollama- brew update: This command fetches the latest information about available packages.
- brew upgrade ollama: This command upgrades Ollama to the latest version if there is a newer release.
Troubleshooting
- Permission Errors: If you encounter permission-related issues (e.g., “Permission denied”), you may need to use
sudobefore some commands, like this:
sudo brew install ollamaNote: Use sudo sparingly and only when necessary, as it gives elevated privileges.
- Homebrew Path Issues: If you encounter issues where the
brewcommand is not recognized, you may need to add Homebrew to your system’sPATH. To do this, run the following command:
  echo 'eval "$(/opt/homebrew/bin/brew shellenv)"' >> ~/.zprofile
  eval "$(/opt/homebrew/bin/brew shellenv)"
With these steps, you should be able to install and start using Ollama on macOS through the command line. In the next blog post i will cover how to run Ollama as a service, and connect a nice Gui to it. And get it into VS Code